Learn how to add a button to a SharePoint list that will start a flow
Let’s say you want the user to start a flow on a specific list item. Maybe they should start and approval flow, create a copy of the list item, or something similar.
What I think is the best user experience, is to add a button to the list item.
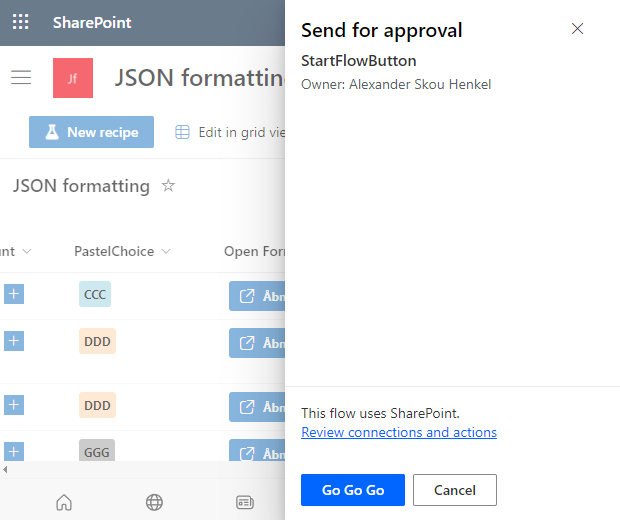
When clicking the button, a side panel will appear. Here we can control the header, and the text of the button that will start the flow.
How to
Create a new Text column
Format the column and add this code
{
  "$schema": "https://developer.microsoft.com/json-schemas/sp/v2/column-formatting.schema.json",
  "elmType": "div",
  "customRowAction": {
    "action": "executeFlow",
    "actionParams": "{\"id\":\"FLOWID\", \"headerText\":\"Send for approval\",\"runFlowButtonText\":\"Go Go Go\"}"
  },
  "style": {
    "display": "flex",
    "align-items": "center",
    "margin-top": "2px",
    "margin-bottom": "2px"
  },
  "children": [
    {
      "elmType": "a",
      "attributes": {
        "class": "ms-bgColor-themePrimary ms-bgColor-themeDarker--hover"
      },
      "style": {
        "cursor": "pointer",
        "height": "30px",
        "text-decoration": "none",
        "display": "flex",
        "align-items": "center",
        "text-align": "center",
        "justify-content": "center",
        "margin": "5px",
        "color": "#fff",
        "border-radius": "3px"
      },
      "children": [
        {
          "elmType": "span",
          "attributes": {
            "iconName": "Flow",
            "class": "ms-fontSize-16 ms-fontWeight-regular",
            "title": "Details"
          },
          "style": {
            "color": "#fff",
            "flex": "none",
            "margin-right": "5px",
            "margin-left": "8px"
          }
        },
        {
          "elmType": "span",
          "style": {
            "margin-right": "8px"
          },
          "txtContent": "Start Flow",
          "attributes": {
            "class": "ms-fontWeight-bold"
          }
        }
      ]
    }
  ]
}
To get the FLOWID, go to Power Automate and open your flow (you don’t need to select edit)
In the URL you can find the ID, see the picture below

In the code, you can change the headline (Send for approval) or the text of the button, starting the flow (Go Go Go)
Start Flow will be the text on your list item, and Flow is the icon - you can find more icons here
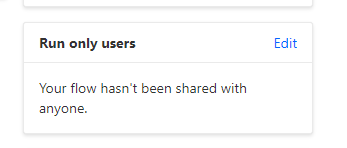
Run only users
When you are creating a flow button like this, your users needs access to run the flow. In Power Automate there is an option called Run only users
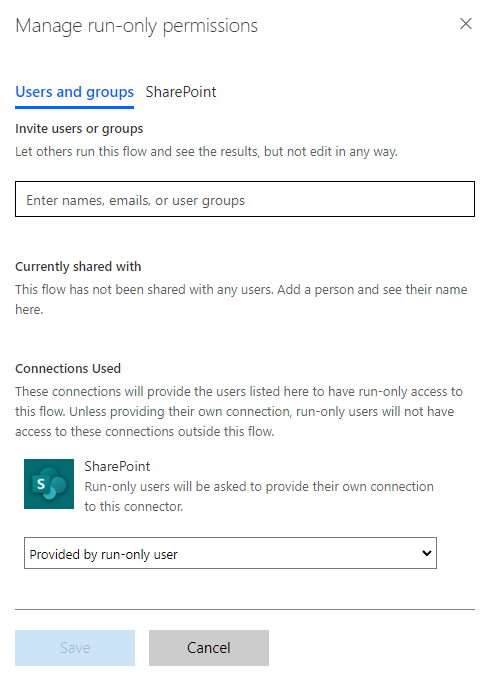
Select the edit button, and add the users (or groups) that will have permission to run the flow.
If you have not added any users here, the button will only work for yourself (since you are the owner of the flow).
If no users is added to the “Run only users”, nothing will happen when the button is clicked.
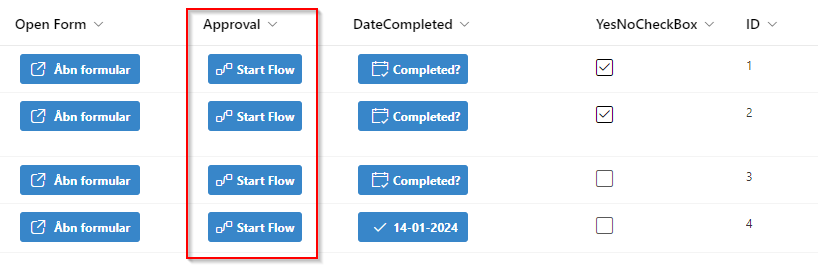
You can now add an action to you items that is easy accessable for your users
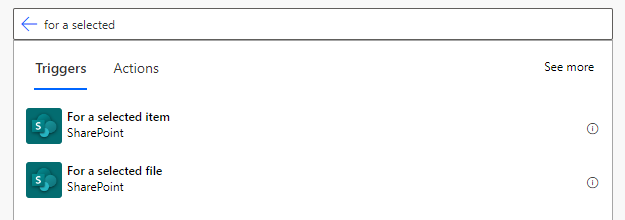
Note that the trigger for your Power Automate should be For a selected item or For a selected file