Learn how to start a Power Automate flow in a model driven app (Dynamics 365)
To see a solution without using Ribbon Workbench, read this post instead
The challenge
In Dynamics 365 there is currently no out-of-the-box solution to start a Power Automate flow from a custom button, and the current version of the modern ribbon customization is not as good (yet) as the Ribbon Workbench developed by my hero Scott Durow
What we want to achieve in this exercise is to create a flow that allows a sales person to create a new item in SharePoint, directly from CRM.
The flow should take information from CRM and use it to create the SharePoint item, and could also write information back to CRM
Solution
Installing XrmToolBox and Ribbon Workbench
The first thing you need to do (if you don’t already have the tool), is to download XrmToolBox and install it locally on your PC.
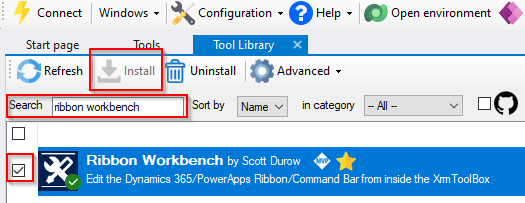
Once the tool is installed, navigate to Open Tool Library in the top right corner

Search for Ribbon Workbench, and install it
Connect to Dataverse
Before you run the tool we need to create a connection to Dataverse
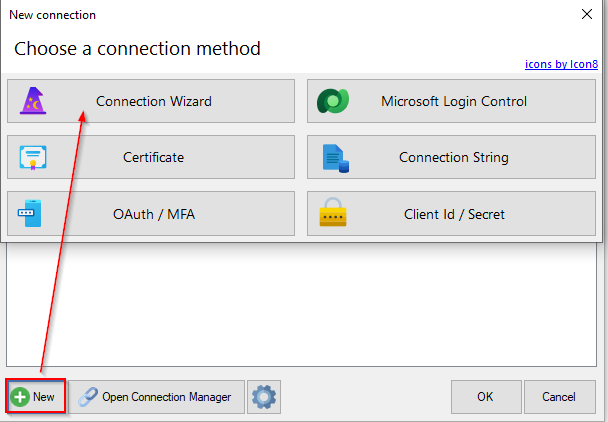
Click on the connect icon in the top left corner, and click new
I prefer to use the Connection Wizard
When you are creating the connection, make sure to change the timeout to a minimum of 4 min.
It usually takes more than 2 min. to publish your solution, and if you only have a 2 min. timeout, you will typically end up with an error.

Create a new solution
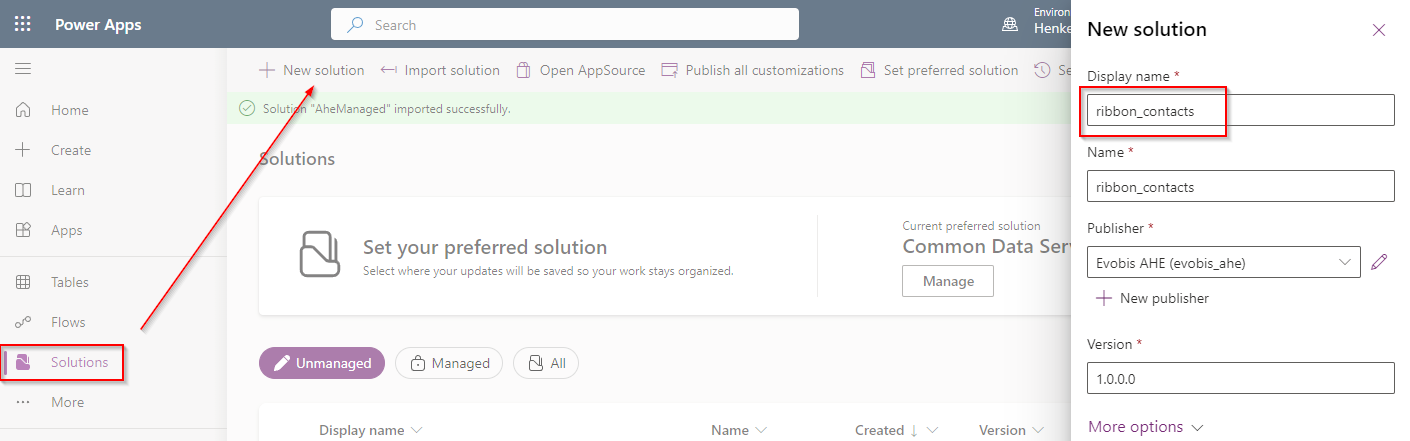
Ribbon Workbench requires an almost empty solution, so before you open the tool, go to make.powerapps.com and create a new solution (one for each table/entity you want to change or a maximum of 3 tables/entities)
Name the solution something like ribbon_tableName
I have named my solution ribbon_contacts
On the next page, select add existing and click Table
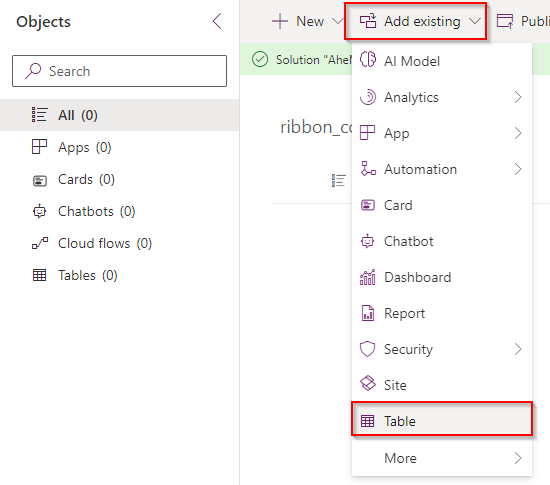
Select the table from where you would like to change the ribbon (or start the flow) and click next.

In the next window make sure that you don’t select Include all objects or Include table metadata

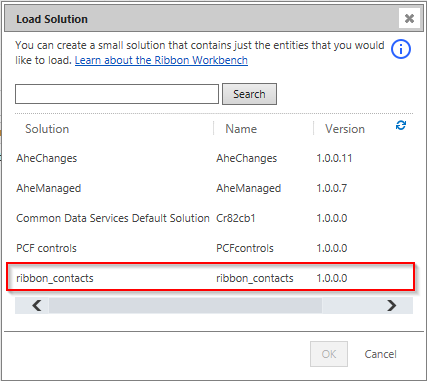
Once you Solution is ready, we can finally open Ribbon Workbench.
When the tool opens you will see below prompt, and you can now connect to your new solution
Ribbon Workbench is a very powerful tool, and I advice you to play around, or come back to this blog for more posts about how to use the tool.
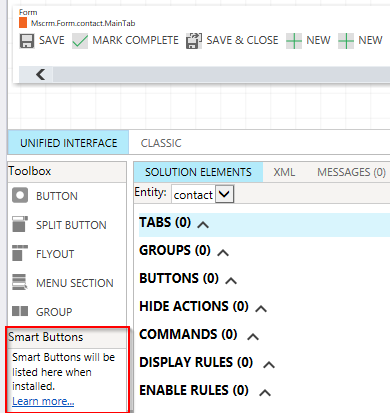
Installing Smart Buttons
To start a flow from Dynamics, we need to use Smart Buttons, because one of them can help us to start a webhook
To install the Smart Buttons go to Scott Durow’s RibbonWorkBench @ GitHub and download the zip file Develop1SmartButtons_1_2_638_1.zip

What you have just downloaded is a Managed Solution - it contains the Javascript that will help to create and run the Smart Buttons
Go back to make.powerapps.com and import the solution/zip file

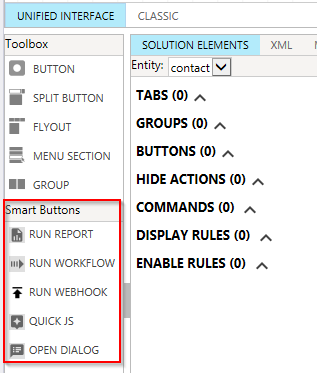
When you solution has been installed, re-open Ribbon Workbench in XrmToolBox, and the Smart Buttons should now be available
Add the Webhook button
First we should drag and drop a run webhook button into our ribbon.
We have 3 different ribbons
- Home
- Subgrid
- Form
We will drag the button to form, meaning that the button will only be visible when the record is opened

In the popup window give your button a title and click OK
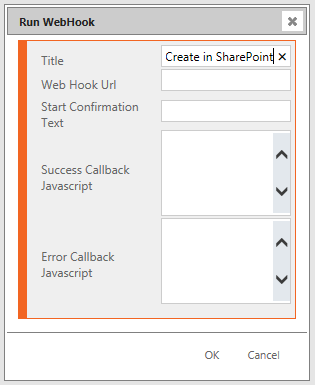
Next we will create the Weeb Hook Url and Success Callback Javascript functions
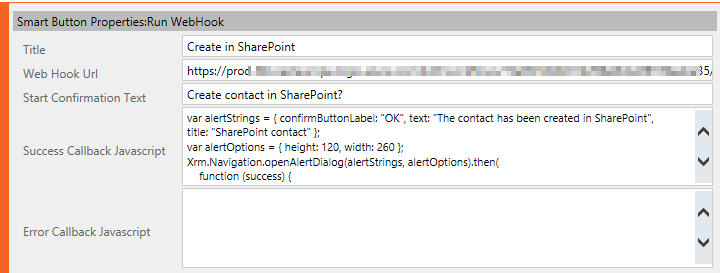
Web Hook Url
Go to make.powerautomate.com and create a new Automated cloud flow
As a trigger you should use When a HTTP request is received
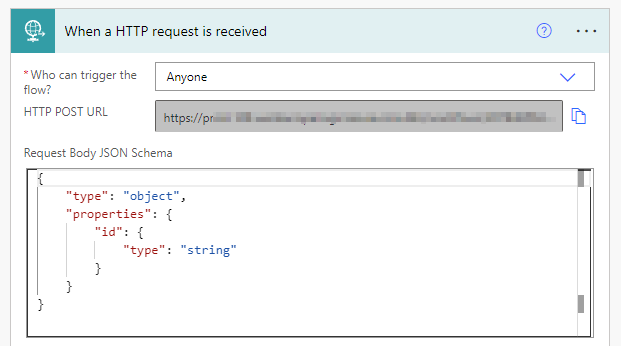
Notice that here is a security risk. Since anyone who (potentially) has this URL could start your flow.
Ribbon Workbench does not currently support if you change the trigger to Any user in my tenant or Specific users in my tenant
In Request Body JSON schema insert the following code
{
    "type": "object",
    "properties": {
        "id": {
            "type": "string"
        }
    }
}
This code will get the ID of the contact person. We can use this ID to receive the remaining information about the contact by using Get a row by ID action

Next insert a new action called Response and insert 200 in Status code

You can now add a new action (before response) to your flow, to create a new item in SharePoint (or whatever you prefer), since you have all of the information for the contact/opportunity/lead from your Get a row by ID action.
Webhook URL
You need to save your Power Automate flow before you can get the HTTP POST URL. Once it has been saved, copy the URL from your trigger action, and insert it into Ribbon Workbench

Success Callback Javascript
We would like to give the user a notification that the contact has been created successfully, so let’s add the following Javascript, that will create a popup window for the user when the flow has finished
var alertStrings = { confirmButtonLabel: "OK", text: "The contact has been created in SharePoint", title: "SharePoint contact" };
var alertOptions = { height: 120, width: 260 };
Xrm.Navigation.openAlertDialog(alertStrings, alertOptions).then(
    function (success) {
        console.log("Alert dialog closed");
    },
    function (error) {
        console.log(error.message);
    }
);
We don’t need to create any error fall back, since a red error panel will be shown in case the flow fails. However, if you are creating more advanced flows we might want to handle an error with a 400 response in our Power Automate Flow.
Publish
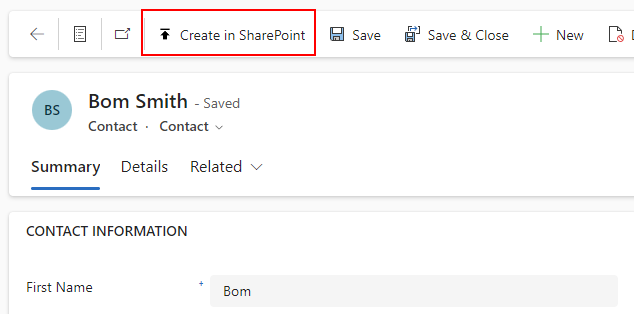
We now have a new button available, and we are ready to hit the Publish button - be patient, it can take up to 4 min. before the solution has been published.
To see the button in CRM you might want to hit CTRL + F5 a couple of times.
Here is our new button
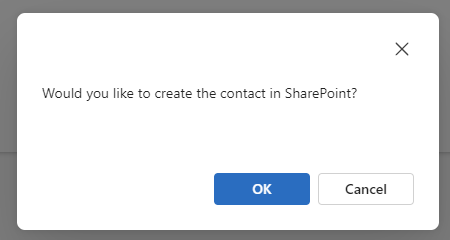
Here is the confirmation dialogue, to confirm that the flow should run
Here we are showing the user that the flow is now running
And here is the dialogue once the flow has finished

There you go, you now know how to start a flow from a custom button - there are other ways we can achieve a similar behaviour, but we will cover that in another post :)