Learn how to create a custom button in Dynamics 365 and change a choice/option set value
The goal
In this exercise we will add a custom button to our model driven app, for the user to change the value of an option set/choice column.
How to
Step 1
In the contacts table create a new choice field and add the following options:
- Has been contacted
- Has not been contacted
Add the field to your form
Step 2
Edit your app, and in the navigation panel click the 3 dots on Contacts view -> Edit command bar -> Edit
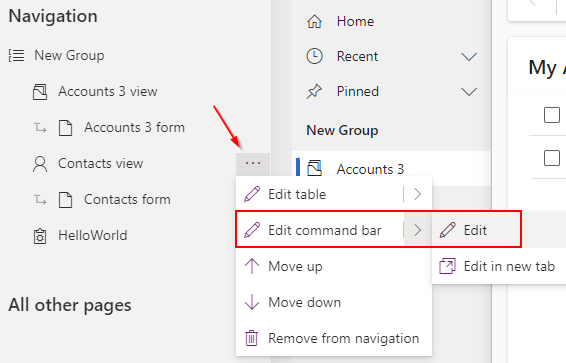
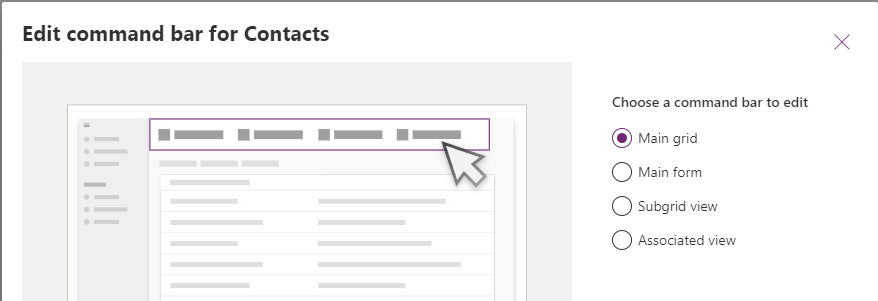
In the next window select Main Form
To add a new button to the ribbon click New in the top left corner and choose Command
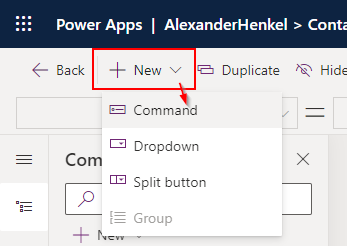
Select your new button and in the command menu bar select a name and an icon

Step 3
Add the following code to the OnSelect property of the button
If(
Self.Selected.Item.'Contact Status' = 'Contact Status (Contacts)'.'Has not been contacted',
Patch(
Contacts,
Self.Selected.Item,
{'Contact Status': 'Contact Status (Contacts)'.'Has been contacted'}),
Patch(
Contacts,
Self.Selected.Item,
{'Contact Status': 'Contact Status (Contacts)'.'Has not been contacted'}
)
);
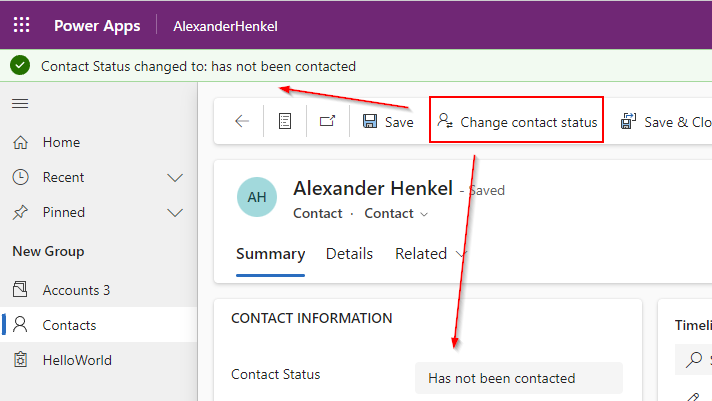
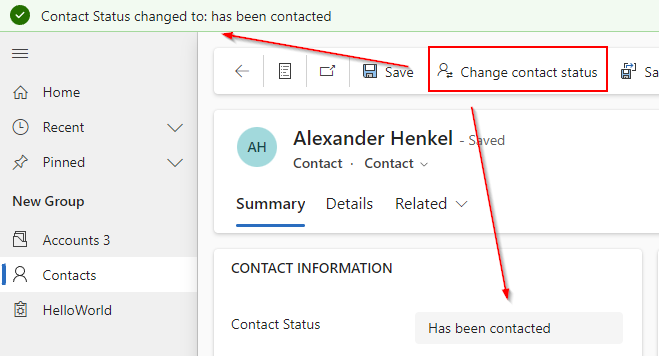
Notify("Contact Status changed to: " & Lower(Self.Selected.Item.'Contact Status'),
NotificationType.Success,5000);
Click save and publish
Step 4
Our new button is now ready in our model driven app, and can change the value of our record