Learn how to change the permission levels for a document set and add an Office 365 Group
In this case we will learn how to change the permission levels for a document set when the user chooses a confidentiality level “strictly confidential”
You can change the permission levels using some default actions, but you can’t make very complex changes, and for some reason it does not support ex. document sets
Here is the Microsoft article for the standard actions
Let’s get started
As a trigger we will use “When a file is created (properties only)
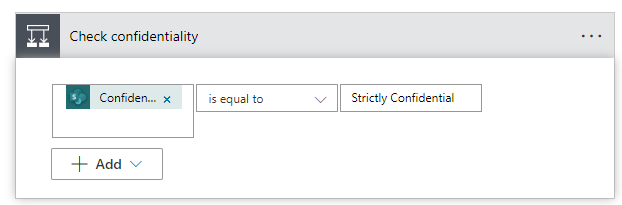
Next we will check if our field value of Confidentiliaty is equal to Strictly Confidential

The permission level in SharePoint can be very complex, but what we want to do is
- Stop inheriting roles
- Remove all permissions for the file
- Add permissions again, and the permission level
Remove permissions
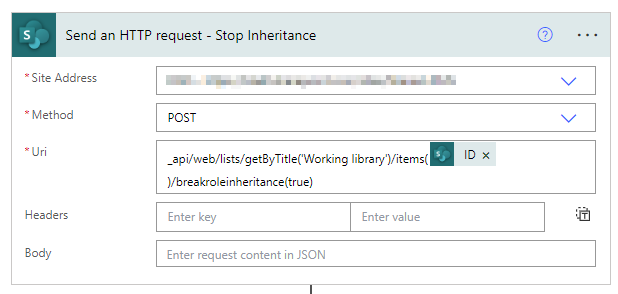
First we will stop inheritance by using the action Send an HTTP request to SharePoint
_api/web/lists/getByTitle('LIBRARYNAME')/items(FILEID)/breakroleinheritance(true)
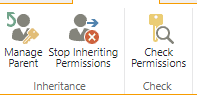
In SharePoint, right click on the File -> Manage Permissions, select the 3 dots in the top right corner and select advanced settings
Now you can see how the permission levels it no longer inherited from the top level of the site, and instead of looking like this 👇
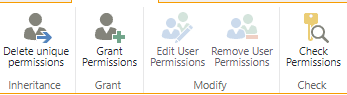
It now looks like this 👇
Now we will get all of the permission that was originally inherited to the file, and delete them one by one.
Add another HTTP request
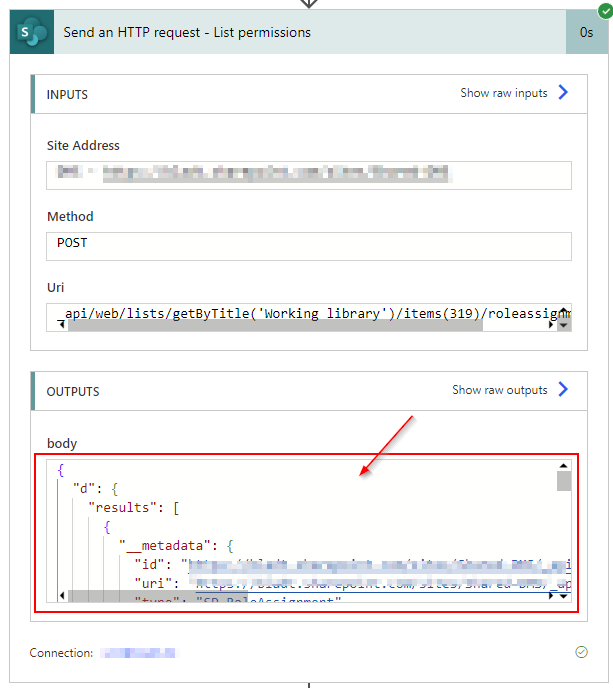
_api/web/lists/getByTitle('LIBRARYNAME')/items(FILEID)/roleassignments

Now, run your flow, because we need the “body” output from above action.
When the flow has run, copy and paste everything from the body
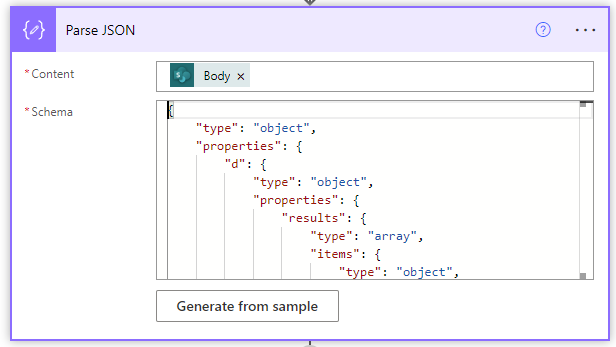
Insert a Parse JSON action, and select Generate from sample, paste in what we just copied and click done
Add another HTTP request action
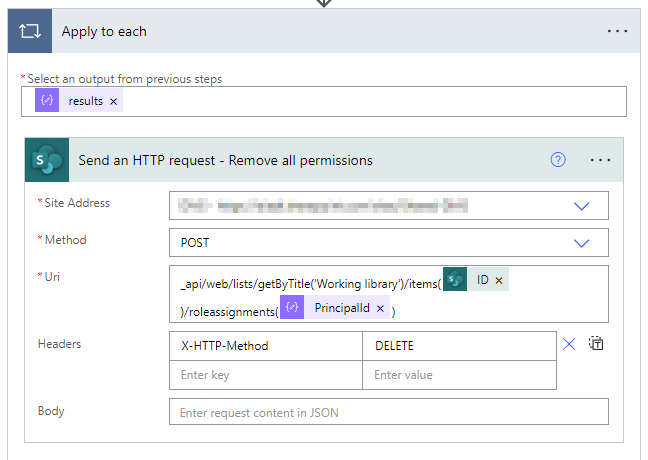
api/web/lists/getByTitle('Working library')/items(FILEID)/roleassignments(PrincipalID)
The principalID will be available from your dynamic content. When you insert the PrincipalID, Power Automate will automatically insert an Apply to each, which is fine, because it is now running trough all of the permissions we collected earlier.
Add below to the Headers to ask for the permissions to be deleted (see the picture below)
X-HTTP-Method
DELETE
Now that we have removed all the permissions, we can now add either a SharePoint Group or an Office 365 Group (note that we need to use a different method, depending on what type of group you are working with)
Remember that when you are removing all of the permission, you are also removing the account that is running the flow. If the flow needs to make any changes to the file or the metadata, remember to add permissions to that account.
Add a SharePoint Group
When we are adding the groups (or people), we need to tell what type of permission is needed (ex. “Full control”, “Read”, “Edit”, “Contribute”, or if you have made your own permission level type)
Each permission has a unique ID, and we can get that with an HTTP request.
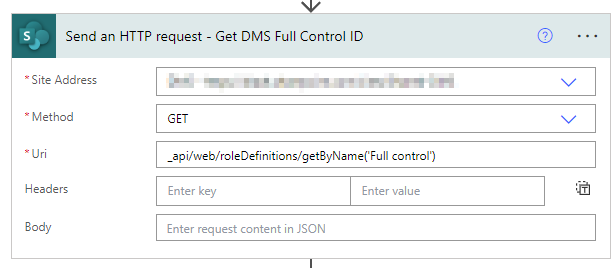
Here we are getting the ID of the “Full control” permission. We will use this information later.
_api/web/roleDefinitions/getByName('Full control')
Next we want to get the ID of the SharePoint group. I have one that is called “DMS Owners”. We will also use this information later.
_api/web/siteGroups/getByName('DMS Owners')
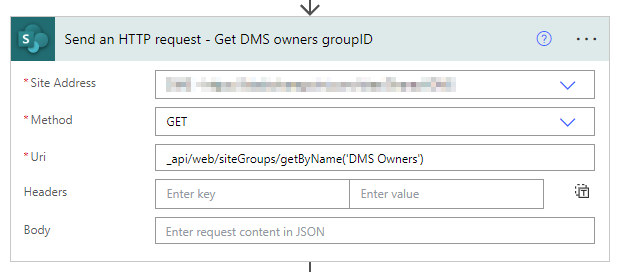
If you run your flow, and look in the output of the two requests we just made, you can see that it begins with “d” and if you scroll down a bit you will also find ID.
Add another HTTP request
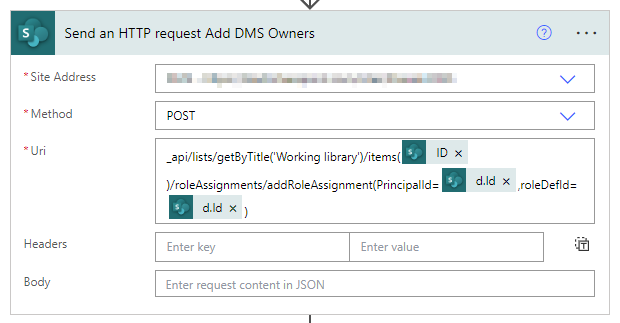
api/lists/getByTitle('LIBRARYNAME')/items(FILEID)/roleAssignments/addRoleAssignment(PrincipalId=GROUPID,roleDefId=PERMISSION)
Now we are using the output from the previous two actions that we added.
Outputs -> “d” -> “ID”
Add below as an expression in your flow (see the picture below)
GROUPID = body('Send_an_HTTP_request_-_Get_DMS_owners_groupID')?['d']?['Id']
PERMISSION = body('Send_an_HTTP_request_-_Get_DMS_Full_Control_ID)?['d']?['Id']
Try to run your flow, and if everything works well, all of your permissions are removed, and your SharePoint Group has now been added with the “Full control” permissions.
Adding an Office 365 Group
On your SharePoint site is, what I will call, a “hidden” list of all the users or groups that has ever associated with the site.
To access the list to go this URL 👇
https://TENANT/sites/YOURSITENAME/_layouts/15/people.aspx?MembershipGroupId=0
If you hover your mouse over the name, you can see in the URL (in your browsers left corner) that they all end with ID=xx
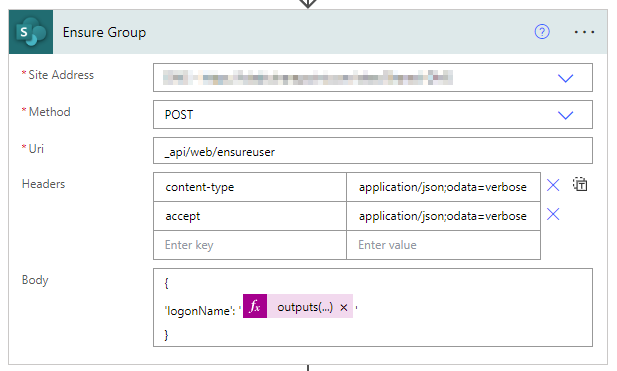
What we want to do now is to get that ID, and we do that by adding another HTTP request
_api/web/ensureuser

content-type    application/json;odata=verbose
accept		    application/json;odata=verbose

{
'logonName': 'groupname'
}
In my example below I have used an expression since the group name is not necessarily always the same, but if the group name is not dynamic, you can hardcode it instead like
’logonName’: ‘groupname’
Now that we have the ID of the group, we can add the group permission to the file.
We will use the same permission levels from earlier (“Full control”)
api/lists/getByTitle('LIBRARYNAME')/items(FILEID)/roleAssignments/addRoleAssignment(PrincipalId=GROUPID,roleDefId=PERMISSION)
Add below as an expression in your flow (see the picture below)
GROUPID = outputs('Ensure_Group')?['body']['d']['Id']
PERMISSION = body('Send_an_HTTP_request_-_Get_DMS_Full_Control_ID)?['d']?['Id']
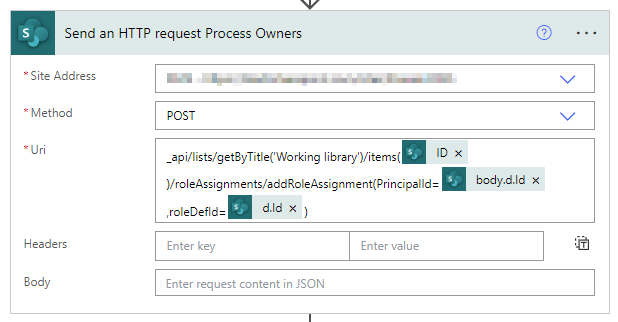
Now we have successfully added an Office 365 Group permission to the file with a “Full control” permission
If you want to add other groups, or use other permission levels, you need to add additional HTTP requests, for each individual group or permission level you want to retrieve.