Learn how to combine two columns in a lookup field, in the Power Apps integrated form (SharePoint)
The Challenge
Working with the SharePoint Integrated Power App Form can be both very frustrating, but can also bring a lot of power to your lists, if you are (like me) a low-code person.
I have build very complex forms, and I think with the new modern components, it is now not looking like it was build in 1999.
I had a case where I had a list of projects, with a lookup field, to a customer source list.
The customer source list had one column with the customer name, and in the other column a customer number.
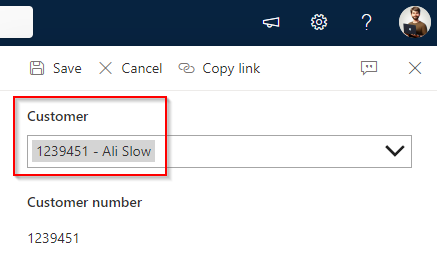
In my project list I wanted to combine the two columns, so that the user could search for both the customer name and customer number in using the same field
The solution
Step 1
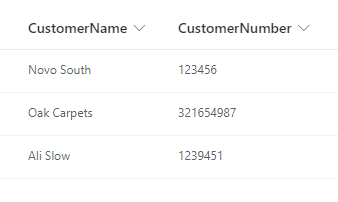
Create a new list named Customers and create two new columns
- CustomerName (Text)
- CustomerNumber (Text/Number)
Step 2
Create another list named MyProject and create one new column
- Customer (Lookup)
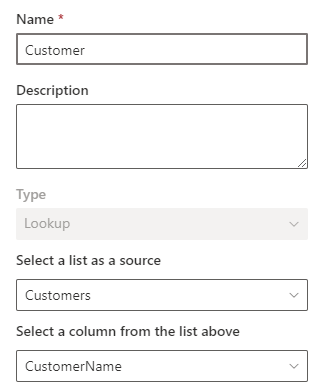
Make your new column lookup into your Customers list and select CustomerName as the column.
Under More options bring over CustomerNumber
Step 3
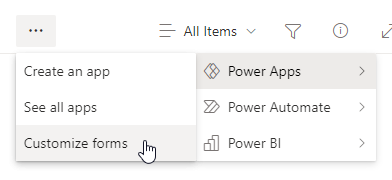
Select the 3 dots in the MyProjects list and go to -> Power Apps -> Customize Forms
In Power Apps, select your DataCardValue with the customer and go to the property Items and insert following code
AddColumns(
        Customers,
        "CustomerNameAndNumber", CustomerNumber & " - " & CustomerName
        )
Now you should be able to see how the customer number and customer name is combined in your datacard.
Try to upload your form and add a new item to your project list and see how… Nothing happens!?
This is because a lookup field is a complex type of field, and to be updated it requires the ID and the Value (CustomerName)
If you select your entire DataCard there is an update property. Right now it is Parent.Default, but since we combined two columns (actually added a new column), we need to give the ID and Value ourself.
Change the code in the update property to the following
{
    Value:DataCardValue2.Selected.CustomerName,
    Id:
    LookUp(
        Customers,
        CustomerNumber = DataCardValue2.Selected.CustomerNumber).ID
}
You might need to change DataCardValue2 to the name of your DataCard
First we are taking the value from our DataCardValue (CustomerName)
Since we don’t have the ID we are using LookUp to find it from our customer list.
We are using the CustomerNumber as the lookup value in our customer list since it should be unique (there is a risk that the same customer could have several accounts)
Try to upload your form to SharePoint again.
Now you can see that the customer is added to an item. But if you open the form (edit or view) you will see that the field is blank. This is because we have to build the “Add columns” in the property DefaultSelectedItems
AddColumns(
        Customers,
        "CustomerNameAndNumber", ThisItem.'Customer: CustomerNumber'.Value & " - " & ThisItem.Customer.Value
        ).CustomerNameAndNumber)
Again, upload your form and see how the field is now both saved to your list, but also shown with the correct data when in edit/view mode.
Remove the - from the form.
We have used a - to combine the two columns, so when you create a new item you will see that the - is just staring at you.

To avoid this, select the SharePointIntegration item from the tree view and to go advanced. In the OnNew property create a new variable: Set(varFormMode, “New”);
In fact, let’s add the form mode to each action, this will be helpful when we are working with more complex forms
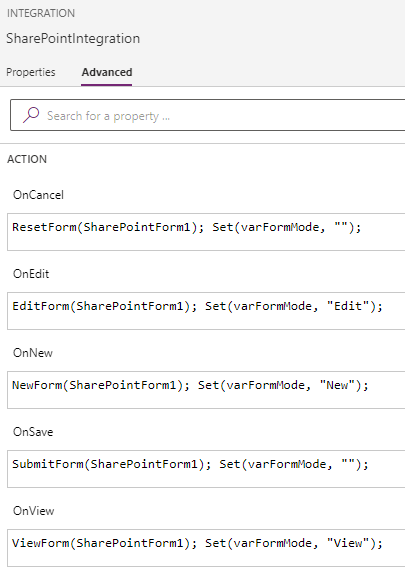
Now we can update the DefaultSelectedItems to show “nothing” if the FormMode = New
If(varFormMode <> "New",
AddColumns(
        Customers,
        "CustomerNameAndNumber", ThisItem.'Customer: CustomerNumber'.Value & " - " & ThisItem.Customer.Value
        ).CustomerNameAndNumber)
We added an if statement saying if varFormMode it not equal to “New” then there should be no default selected item, otherwise it should be the value of the item we selected
There you go, you now know how to combine two columns in a combo box but also how to update a lookup field