Learn how to create a dialog with user inputs, when a button is clicked in a Model Driven App
The goal
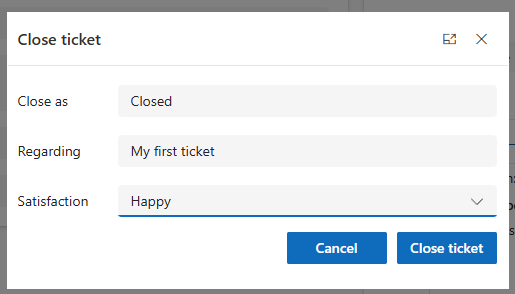
In this blog post we will create a dialog that can handle user inputs.
When the user clicks a button we will be able to
- Patch user inputs to a table
- Create a note in the timeline
- Reuse our code for other dialogs.
I expect that you have some experience with Model Driven Apps when following this blog post
Tables
We will create two new tables, that can handle tickets, and a related table that can handle the status of the table.
Table 1 - Ticket
| Title | Description | Priority* | Ticket status* |
|---|---|---|---|
| MainColumn | TextArea | OptionSet | OptionSet |
-
Priority
- Low
- Medium
- High
- Critical
-
Ticket Status
- Open
- Closed
- Reopened
Table 2 - TicketClosed
| Title | Regarding | Ticket status | Satisfaction* |
|---|---|---|---|
| MainColumn | Lookup (Ticket) | OptionSet | OptionSet |
- Satisfaction
- Happy
- Neither or
- Sad
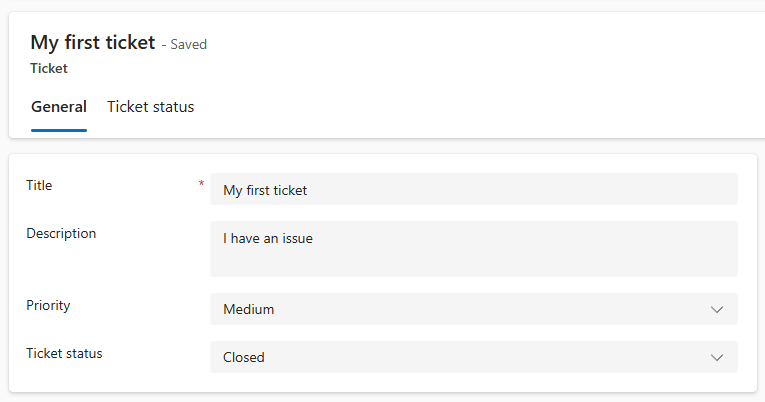
Once the tables have been setup, go ahead and create your Model Driven App form
This is how mine looks
Add a custom page
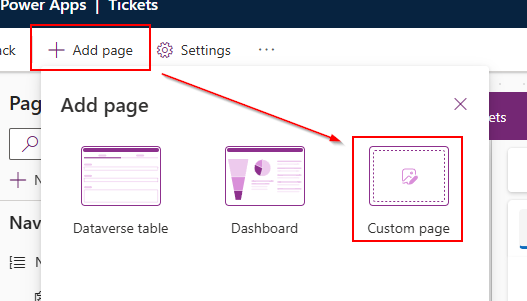
The dialog will be created in Power Apps studio as a Custom Page
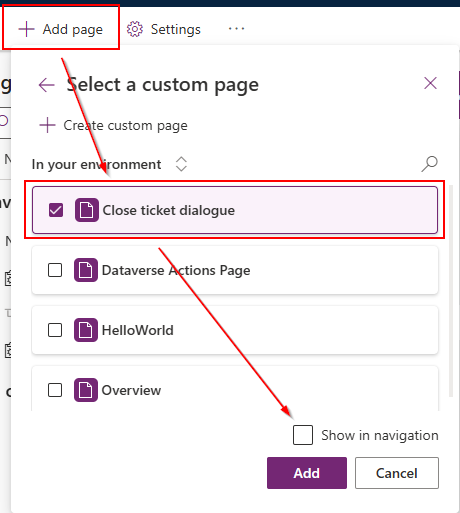
Step 1
In your app click + Add page and select Custom page
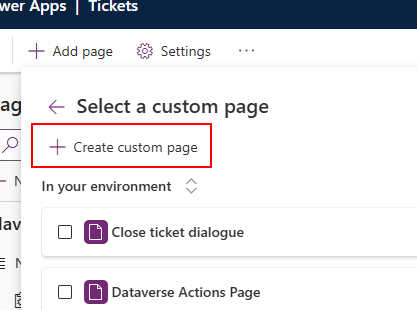
Step 2
Click Create custom page and give it a name. I have called mine Close ticket dialog
Creating a responsive dialog
We will create a responsive dialog, so that that we have a “boiler plate” app we can use for other dialogs.
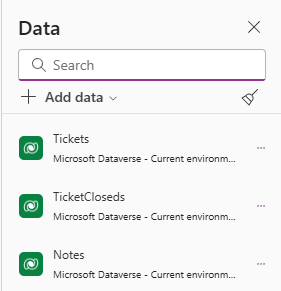
Before we start working in the app we will add 3 tables in the Data section
Go ahead and add the following 3 tables
Step 1
In the App section insert the following code
MinScreenHeight
If(IsBlank(Param("recordId")), 300, ""
- 53
//Setting height to 300 px. when working in the Power Apps Studio
MinScreenWidth
If(IsBlank(Param("recordId")), 500, "")
//Setting width to 500 px. when working in the Power Apps Studio
OnStart
If(
  IsBlank(Param("recordId")),
  Set(recordId, First(Tickets).Ticket);
    Set(recordItem, LookUp(Tickets, (First(Tickets).Ticket = GUID(recordId)))
),
  Set(recordId, Substitute(Substitute(Param("recordId"), "{", ""), "}", "")) &&
    Set(recordItem, LookUp(Tickets, (Ticket = GUID(recordId)))));
//Getting the first record from the ticket table when working in the Power Apps Studio,
//else we are setting recordID to the selected record in the Model Driven App
Step 2
Insert a vertical container with the following properties
DropShadow: DropShadow.None
Height: Parent.Height
LayoutAlignItems: LayoutAlignItems.Stretch
LayoutDirection: LayoutDirection.Vertical
PaddingBottom: 10
PaddingLeft: 10
PaddingRight: 10
PaddingTop: 10
Width: Parent.Width
DropShadow: none
X: 0.00
Y: 0.00
Step 3
Insert a horizontal container with the following properties
Flexible height: Off (in the properties panel)
Height: 50
Minimum width: 0 (in the properties panel)
Drop shadow: None (in the properties panel)
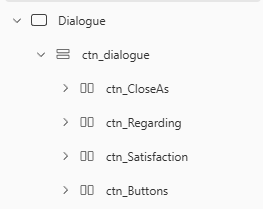
Copy the container 3 times, and rename your containers
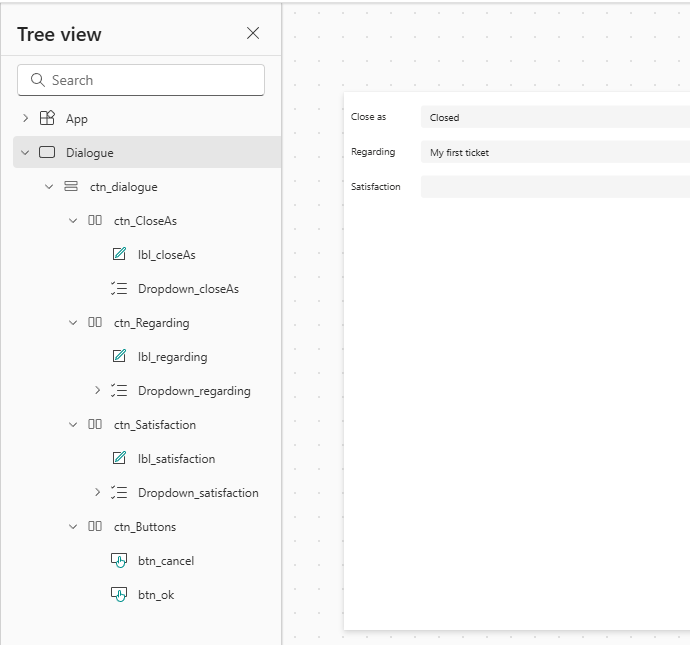
Your tree view should now look something like this
Step 4
In the ctn_CloseAs container insert a label with the following properties
AlignInContainer: AlignInContainer.Center
Text: "Close as"
Width: 100
Step 5
Insert a Dropdown Modern Control with the following properties
AlignInContainer: AlignInContainer.Center
Items: Choices(TicketCloseds[@'Ticket status'])
DefaultSelectedItems: ["Closed"]
DisplayMode: DisplayMode.View

**If you don't get any items, make sure that "ticket status" is the actual name of your choice column**
Step 6
In the ctn_Regarding insert a Dropdown with the following properties
DefaultSelectedItems: recordItem
DisplayMode: DisplayMode.View
Items: recordItem
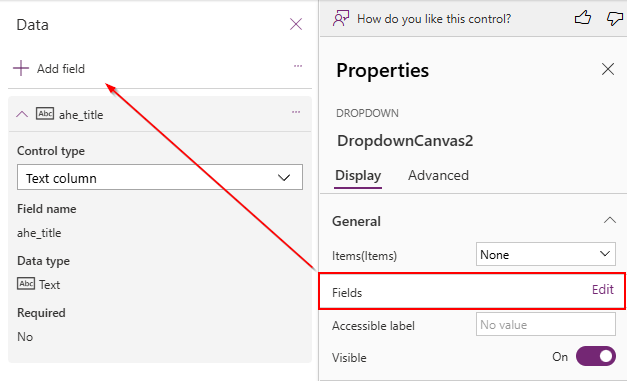
Don’t forget to select a field for your dropdown, otherwise it will be blank
Step 7
Our ctn_Button will have a some different properties due to the alignment of the buttons
LayoutGap: 10
LayoutJustifyContent: LayoutJustifyContent.End
Create a new button with the following properties
OnSelect: Back()
Text: "Cancel"
Step 8
Create a new button with the text Close ticket
In the OnSelect property, insert the below code
//Change status of the record to "Closed"
Patch(
    Tickets,
    recordItem,
    {'Ticket status': 'Ticket status (Tickets)'.Closed}
);

//Set the variable "lookupRecord" to see if the record has been closed earlier
//We are looking for a record in the TicketsClosed table
Set(lookupRecord, LookUp(TicketCloseds, Regarding.Ticket = recordItem.Ticket));

If(
    //if no record exists create a new one in the TicketsClosed table
    IsBlank(lookupRecord),
    Patch(
        TicketCloseds,
        Defaults(TicketCloseds),
        {
            'Ticket status': 'Ticket status (TicketCloseds)'.Closed,
            Title: recordItem.Title,
            Regarding: recordItem,
            Satisfaction: Dropdown_satisfaction.Selected.Value
        }),
        //if record exists, update record in the TicketsClosed table
        Patch(TicketCloseds, lookupRecord,
        {
            'Ticket status': 'Ticket status (TicketCloseds)'.Closed,
            Title: recordItem.Title,
            Regarding: recordItem,
            Satisfaction: Dropdown_satisfaction.Selected.Value
  }
    ));

//Create a note
Relate( recordItem.Notes,
    Patch(
        Notes,
         Defaults(Notes),
          {
            Title: "Ticket is closed",
            Description: Dropdown_satisfaction.Selected.Value,
            'Is Document':'Is Document (Notes)'.No
            }
        )
    );

//Navigate to the current record to refresh the form
Navigate(recordItem)
Our dialog is now ready to be published and added to our Model Driven App
Inside the app where we created the custom page we must now add the custom page we just created, and publish the app. Otherwise the next steps won’t work
Add a custom button (close ticket)
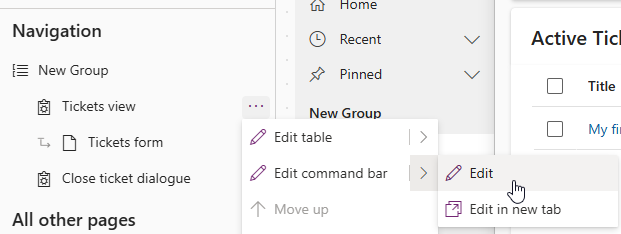
Step 1
Navigate to edit the commandbar
Step 2
Create a new button with the text Close ticket.
For the visibility rule, we want to make sure that the button is only visible when the ticket is open, so we will use the following visibility rule
If(Self.Selected.Item.'Ticket status' <> 'Ticket status (Tickets)'.Closed, true, false)
Step 3
The functionality of the button will be created by adding a JavaScript library.
The code is
function main(
  formContext,
  selectedEntityTypeName,
  FirstSelectedItemId,
  SelectedControlSelectedItemCount,
  DialogWidth,
  DialogHeight,
  DialogTitle,
  CustomPageName
) {
  // Get the record GUID if we have a formContexst and remove the {} from the GUID
  const recordGUID = formContext?.data?.entity?.getId()?.replace(/[{}]/g, "");
  const entityId = FirstSelectedItemId ?? recordGUID;
  const SelectedItem = SelectedControlSelectedItemCount ?? 0;

  // Dialog
  const pageInput = {
    pageType: "custom", //Custom page type
    name: CustomPageName, //Unique name of custom page
    entityName: selectedEntityTypeName, //Entity Name
    recordId: FirstSelectedItemId ?? recordGUID, //Record from listview or form
  };

  console.log(pageInput);

  // Update item to check if the button is pressed in a form or list view
  // Custom Pages can only get EntityId and EntityName as parameters

  // const data = {
  //  ahe_buttonselectedinform: SelectedItem === 0 ? "true" : "false",
  // };

  // Xrm.WebApi.updateRecord(selectedEntityTypeName, entityId, data);

  // Dialog Options

  const navigationOptions = {
    target: 2,
    position: 1,
    width: { value: DialogWidth, unit: "px" },
    height: { value: DialogHeight, unit: "px" },
    title: DialogTitle,
  };

  // Open the dialog

  Xrm.Navigation.navigateTo(pageInput, navigationOptions)
    .then(function () {
      // Called when the dialog close
    })
    .catch(function (error) {
      // Handle error
      alert("CANCEL");
    });
}
Some of the code is commented out. We will use that later in another post.
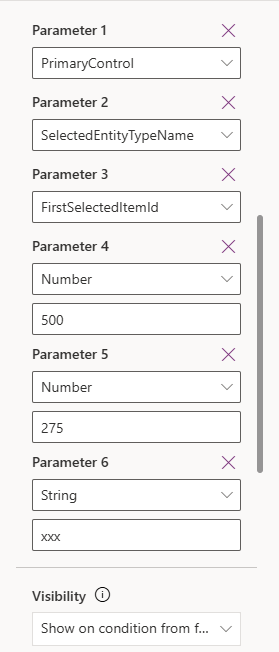
In the function name write main and add the following 8 parameters
Parameter 1:
PrimaryControl
Parameter 2:
selectedEntityTypeName
Parameter 3:
FirstSelectedItemId
Parameter 4:
SelectedControlSelectedItemCount
Parameter 5: (the width of the dialog in px)
Number
500
Parameter 6: (the height of the dialog in px)
Number
275
Parameter 7: (the headline of the dialog)
String
Close ticket
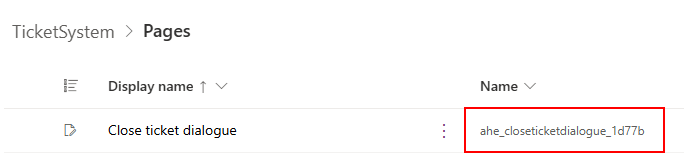
Parameter 8: (the name of the custom page)
ahe_closeticketdialog_1d77b
The custom page name for parameter 8 can be taken from the solution under pages
Here is how my setup looks like
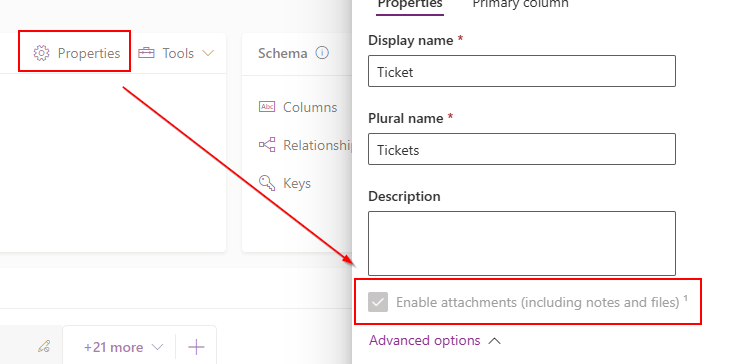
Accepting notes
Before we can add notes to our custom table, we need to enable notes in the properties of the table
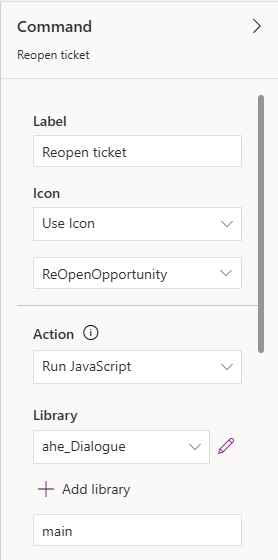
Reopen ticket
To reopen the ticket you can use almost the same logic as above. Create a new custom page, and reuse the app we just made. The same JavaScript library can also be reused.
See also
- Remove whitespace from an integrated Power App in a tab
- Filter and search the termstore in SharePoint with Power Automate
- Collect data from multiple SharePoint sites in Power Apps
- Work with multi-choice, multi-lookup & multi-choice-people fields from SharePoint in Power BI
- Copy a file from one library to another with full version history in SharePoint using Power Automate