Learn how to create a dynamic table with SharePoint list data
The use case
Each week we want Power Automate to send out an e-mail to the manager with all of the projects that still has the status open.
We want to present the data in a table style
Since the number of open projects are not always the same, the table needs to be build dynamically.
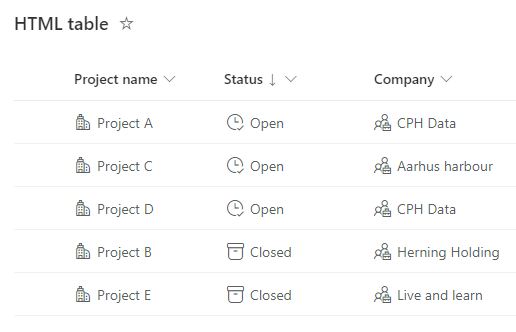
This is how my SharePoint list looks - 3 projects are Open and 2 projects are Closed
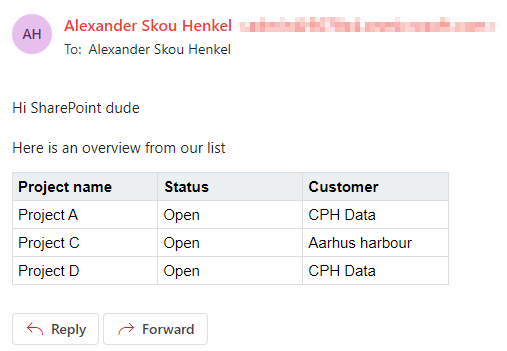
This is the e-mail output we are aiming for
Power Automate
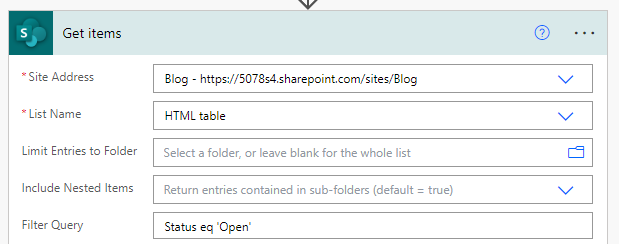
The first thing we need is to get all the open projects, by using the get items action, and then filter the status value with open
If you would like the items to be presented in the specific order, use the Order By option
Building the table rows
Next we are going to insert a select action so that we for each value in our get items is building a table row.
We are going to use inline styling for our HTML, since I experienced that f.ex. G-mail does not read the styling if we use standard CSS
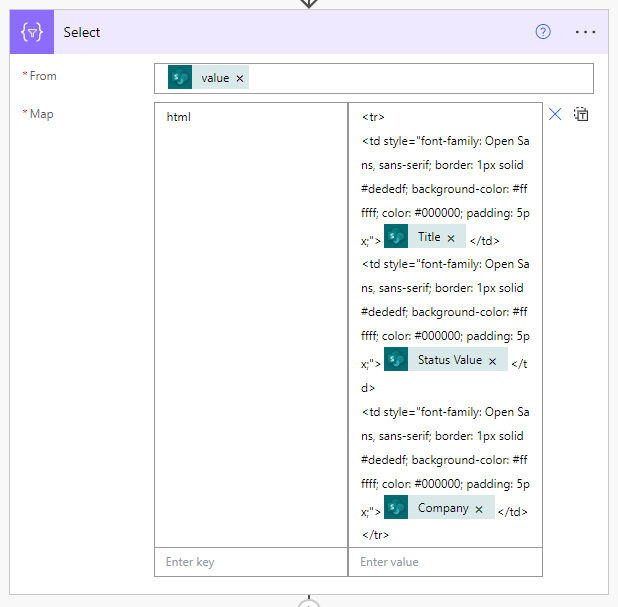
Here is the code for creating the table rows
<tr>
<td style="font-family: Open Sans, sans-serif; border: 1px solid #dededf; background-color: #ffffff; color: #000000; padding: 5px;">TITLE</td>
<td style="font-family: Open Sans, sans-serif; border: 1px solid #dededf; background-color: #ffffff; color: #000000; padding: 5px;">STATUS</td>
<td style="font-family: Open Sans, sans-serif; border: 1px solid #dededf; background-color: #ffffff; color: #000000; padding: 5px;">COMPANY</td>
</tr>
In your select action write html in the left site, and on the right site, insert the code above.
TITLE, STATUS & COMPANY should be replaced with your dynamic content. (refer to the picture above)
With the select action we have build a table row for all of the values we received in our get items.
Later on we are going to join all this code into a single string, so insert another select action
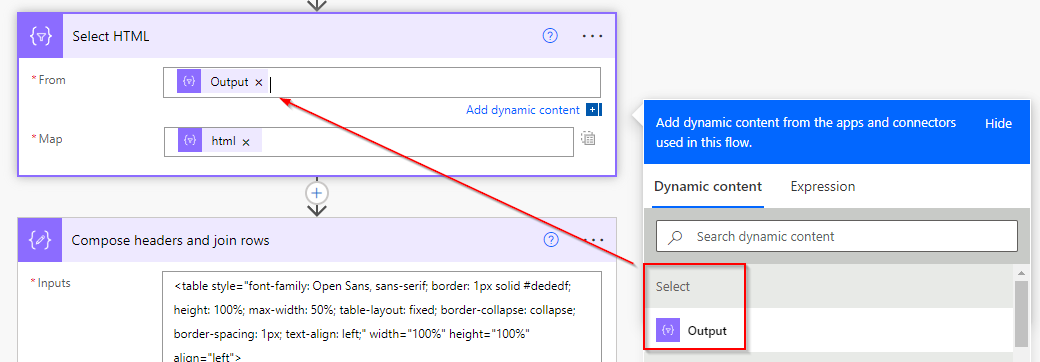
From should be the output from our previous select action, but the Map value we have to write ourself as an expression:
item()?['html']
Building the table
Our next action is going to be a compose action
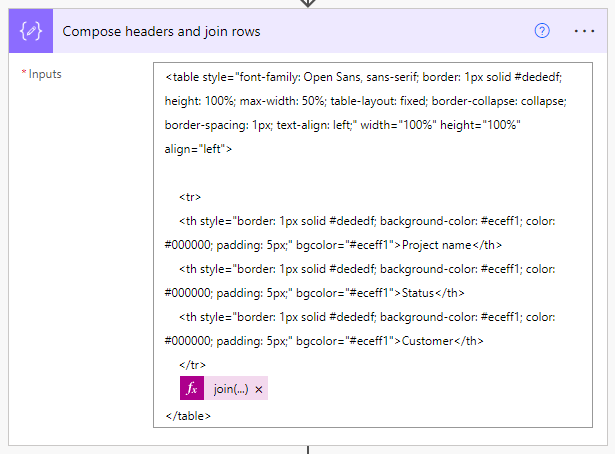
Here you should insert the following code
<table style="font-family: Open Sans, sans-serif; border: 1px solid #dededf; height: 100%; max-width: 50%; table-layout: fixed; border-collapse: collapse; border-spacing: 1px; text-align: left;" width="100%" height="100%" align="left">

    <tr>
    <th style="border: 1px solid #dededf; background-color: #eceff1; color: #000000; padding: 5px;" bgcolor="#eceff1">Project name</th>
    <th style="border: 1px solid #dededf; background-color: #eceff1; color: #000000; padding: 5px;" bgcolor="#eceff1">Status</th>
    <th style="border: 1px solid #dededf; background-color: #eceff1; color: #000000; padding: 5px;" bgcolor="#eceff1">Customer</th>
    </tr>
    HERE WE ARE GOING TO INSERT AN EXPRESSION
</table>
This code is building the table header, and is implementing all the table rows we made earlier - Again, we are building the table with inline styling, to be sure that it looks correct in most e-mails.
Replace Project name, Status, and Customer with your own headlines.
Join expression
We are going to join all of the table rows that we created earlier in one long string, by using the following expression
join(body('Select_HTML'),'')
Finally we have build a dynamic table that we can insert into our e-mail like this
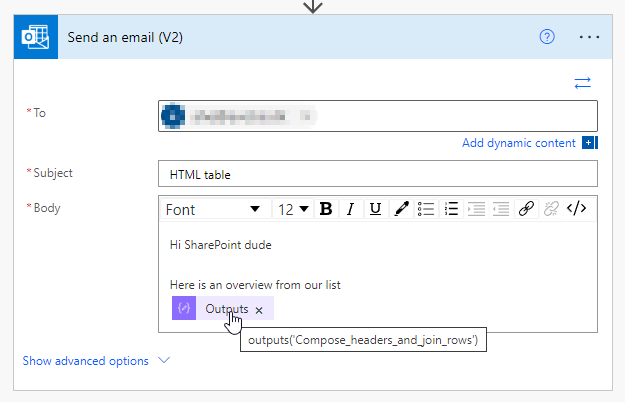
Test out your new Power Automate, and enjoy your new dynamic table
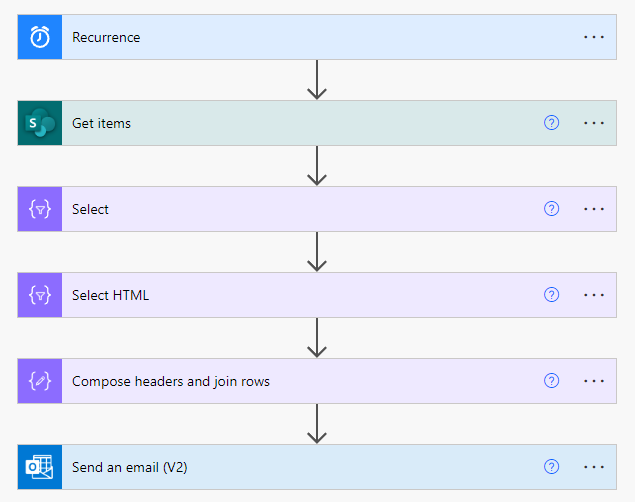
Here is my entire flow
See also
- Get all Power Automate flows in an environment in a spreadsheet
- Filter and search the termstore in SharePoint with Power Automate
- This operation contains a token that does not exist in the current workflow.
- Show last refresh date in local time on powerbi.com
- Get SharePoint Document Set version history