Learn how to get a list of all Power Automate flows (as an admin)
The challenge
From admin.powerapps.com we can get a list of all flows in our environment, but there is no export button, and you have to click load more to get a full list.
Microsoft has also build a Power BI report, but it only shows the flows that has run the last 30 days.
Solution
We can use Power Automate to create a list of all flows, and export it into a spreadsheet.
Note that you need to have Power Platform admin permissions
Step 1
Create a new instant cloud flow and select Manually trigger a flow
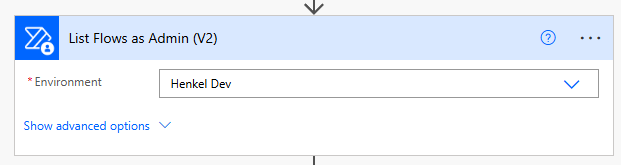
Insert the action List Flows as Admin (V2) and sign in with the Authentication Type: Microsoft Entra ID Integrated
Select the environment you would like to get an overview from.
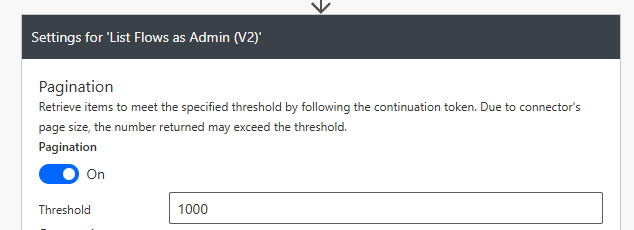
Important step, don’t miss this
Click on the 3 dots (…) and go to settings
Turn on Pagination and set the Threshold to 1000, otherwise you won’t get all flows.
You can choose to do this later on if you would like to test your flow first with the top count (ex. get the first 10 flows)
Step 2
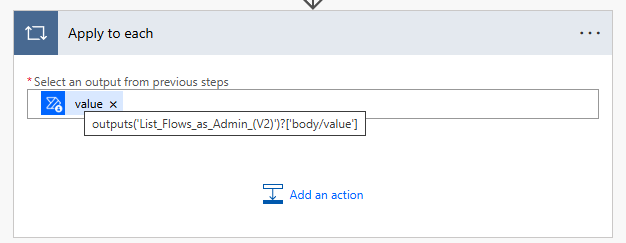
Insert an apply to each action and insert the value field from your List Flows as Admin (V2) output.
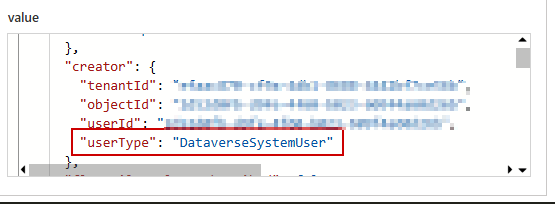
The action does not give us the name of the person who owns the flow, but only an ID. There is also a chance that the owner does no longer work for your company, and we won’t be able to get any username based on the ID.
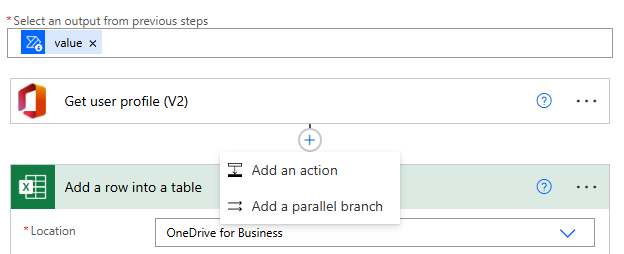
Insert an Get user profile (V2) and copy poaste below into the User (UPN)
@{items('Apply_to_each')?['properties']?['creator']?['objectId']}
You can also insert it as an expression:
items('Apply_to_each')?['properties']?['creator']?['objectId']
Step 3
Go to your OneDrive for Business and create a new Excel file.
Insert the following headers in row 1
- FlowName
- FlowID
- State
- CreatedBy
- CreatedDate
In Excel go to Home and click Format As Table, and select My Table has headers

Step 4
Back in Power Automate insert a new Add a row into a table action and navigate into OneDrive and the file location
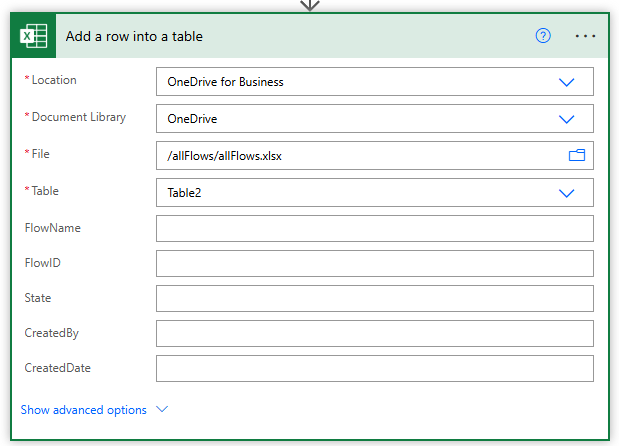
Insert the following into the new row action
- FlowName:
@{items('Apply_to_each')?['properties/displayName']} - State:
@{items('Apply_to_each')?['name']} - CreatedBy:
@{items('Apply_to_each')?['properties/state']} - CreatedBy:
@{outputs('Get_user_profile_(V2)')?['body/displayName']} - CreatedDate:
@{formatDateTime(item()?['properties']?['createdTime'], 'dd-MM-yyyy')}

We can run our flow now as it is, but in case we can’t find the owner of the flow, we want to handle that as well.
I also found that some of the flows are from managed solutions (like Copilot Studio Kit etc.)
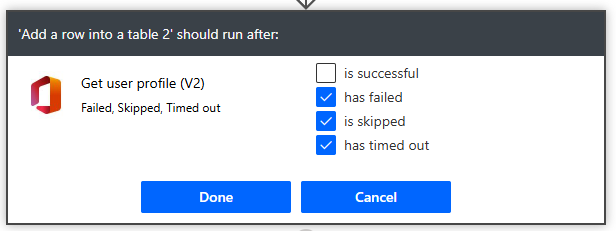
Take a copy of your add a row into a table action and above that action click the + sign and select add a parallel branch
Select the 3 dots (…) and click configure run after and unselect is successful and select the other 3
Change CreatedBy to userType instead
@{items('Apply_to_each')?['properties/creator/userType']}
We can now run the flow. If everything is setup correctly we will now have all the flows available in a spreadsheet
