Learn how to email leads from the past 24 hours to the specific lead owner in an HTML table
The challenge
In this case, new leads are generated automatically in Dynamics 365, from a webpage contact form, and then assigned to different owners.
We want to collect the new leads from the past 24 hours and send each individual owner a reminder (in a table format) via email.
The challenges we have
- The createdon time in Dynamics is in UTC (while I live in Denmark).
- We need to identify owners who have new leads to avoid sending empty tables/emails.
- We must create a table that includes only the leads for a specific owner.
- We need to construct the table format for the email.
The solutions
We will create a Power Automate flow that runs daily at 10:00 AM (local time) that collects all new leads created in the past 24 hours and assign them to their respective owners.
This is the flow we are going to build
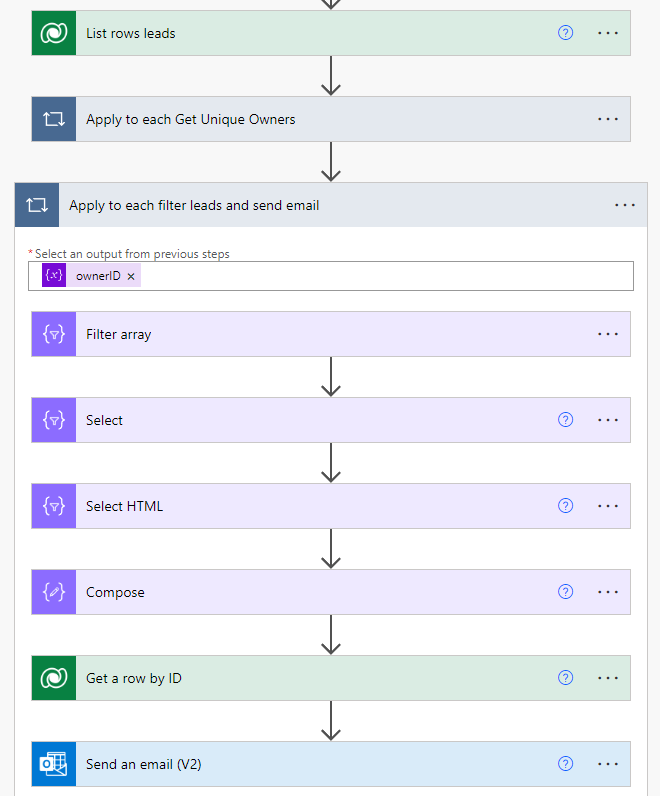
The flow
Create a scheduled cloud flow
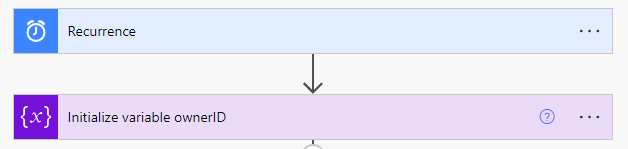
First we will create a new scheduled cloud flow and set it to run at 10:00 AM. We will initialize a new array variable called OwnerID to store all the different owners.
Retrieve leads within the past 24 hours
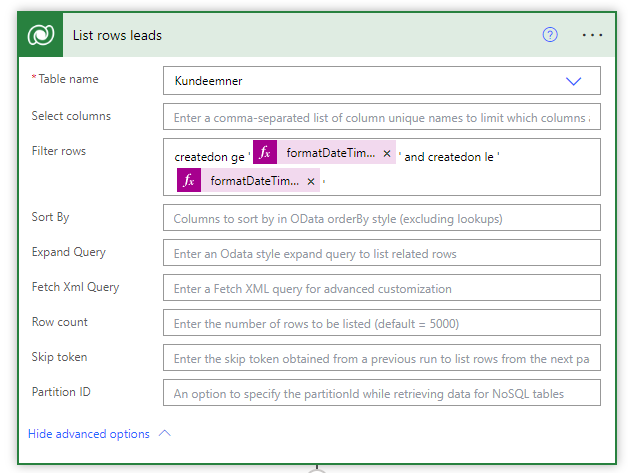
To retrieve leads created within the past 24 hours, we will query the leads table, and apply an ODATA filter to the createdon field.
The data we get from Dataverse from the column createdon is in UTC, and we want to convert that to our current timezone.
Since the flow is running at 10:00 AM we will just get the current UTC() time, convert the timezone from UTC to (in my case) W. Europe Standard Time, and then we will subtract 1 day (addDays -1)
Expression 1
formatDateTime(addDays(convertTimeZone(utcNow(), 'UTC', 'W. Europe Standard Time'), -1), 'yyyy-MM-ddTHH:mm:ssK')
Next we will use the same code, but without removing 1 day.
Expression 2
formatDateTime(convertTimeZone(utcNow(), 'UTC', 'W. Europe Standard Time'), 'yyyy-MM-ddTHH:mm:ssK')
The final filter rows will look something like:
created on ge ’expression1’ and createdon le ’expression2’
- ge = Greater than or equal to
- le = Less than or equal to
Get unique owners
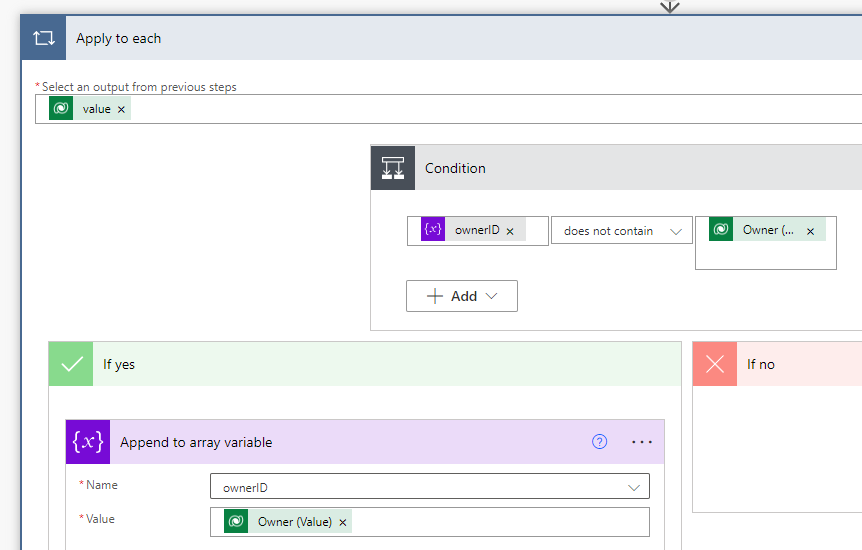
Now that we have all the leads within the past 24 hours, we will loop through each of them, to find out who owns the leads.
-
Create an apply to each action and insert value from List rows leads
-
Inside the apply to each add a condition that express: ownerID does not contain Owner (Value)
-
Then in the Yes condition, add an Append to array variable and add the value to the array variable
Now we know how many unique owners we have, and who we should send an e-mail.
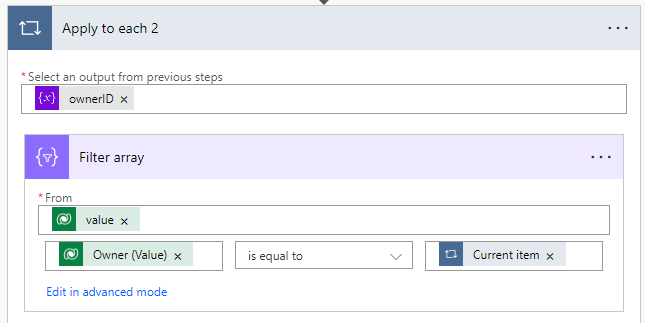
Create a loop for each owner and filter array
Create another apply to each (outside the previous loop) and this time select ownerID as the output from the previous step
Create a Filter array action and add the following
- From = Value (from List Rows)
- Owner (Value) is equal to current item (be careful: You have two current item so make sure you select the one from your second/current loop)
Select columns
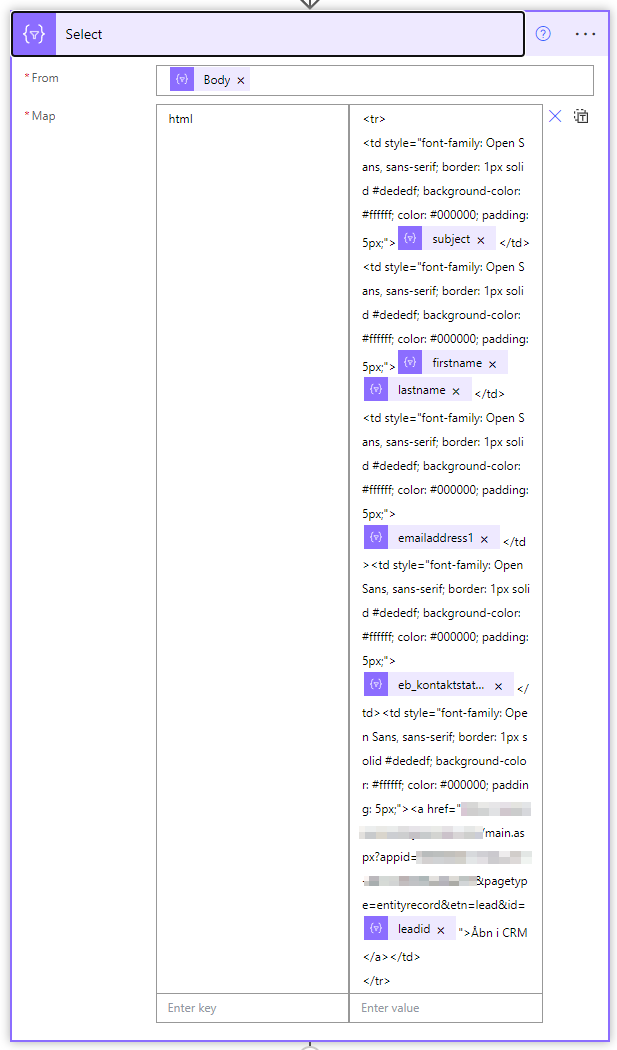
Add a Select action and in the From add Body from our Filter Array action
Now we will begin to build our table. In the Map write html in the left site column.
For my HTML table, I have taken the following fields
- subject
- firstname
- emailaddress1
- The ID so that I can create a link
You can get the internal names of the columns you are looking for by looking inside the filter array output (this is just one way to get the column names)
Very important You should replace each item within the { } in the below html code with the following expression
{item()?['subject']} should be replaced with following expression item()?['subject']
In the last column, Open in CRM, replace YYY with your tenant and ZZZ with your app ID
<tr>
<td style="font-family: Open Sans, sans-serif; border: 1px solid #dededf; background-color: #ffffff; color: #000000; padding: 5px;">{item()?['subject']}</td>
<td style="font-family: Open Sans, sans-serif; border: 1px solid #dededf; background-color: #ffffff; color: #000000; padding: 5px;">{item()?['firstname']} @{item()?['lastname']}</td>
<td style="font-family: Open Sans, sans-serif; border: 1px solid #dededf; background-color: #ffffff; color: #000000; padding: 5px;">{item()?['emailaddress1']}</td>
<td style="font-family: Open Sans, sans-serif; border: 1px solid #dededf; background-color: #ffffff; color: #000000; padding: 5px;"><a href="https://YYY.crm4.dynamics.com/main.aspx?appid=ZZZ&pagetype=entityrecord&etn=lead&id={item()?['leadid']}">Open in CRM</a></td>
</tr>
Select HTML
Still working inside your loop add another Select action - Output should be from the previous Select action we just created.
Click the little icon with a T and insert the following expression
item()?['html']
![Power Automate second Select action using the first Select output with the expression item()?[‘html’] to extract each HTML row string](/img/mailNewLeads6.png)
Building the table
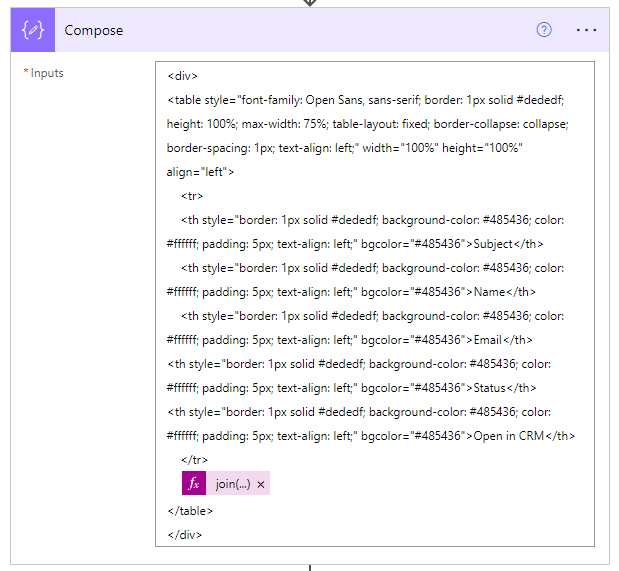
Next up, create a new compose action
The below code is building the table header, and is implementing all the table rows we made earlier.
Insert the following code in the compose action
<div>
<table style="font-family: Open Sans, sans-serif; border: 1px solid #dededf; height: 100%; max-width: 75%; table-layout: fixed; border-collapse: collapse; border-spacing: 1px; text-align: left;" width="100%" height="100%" align="left">
    <tr>
    <th style="border: 1px solid #dededf; background-color: #eceff1; color: #000000; padding: 5px; text-align: left;" bgcolor="#eceff1">Subject</th>
    <th style="border: 1px solid #dededf; background-color: #eceff1; color: #000000; padding: 5px; text-align: left;" bgcolor="#eceff1">Name</th>
    <th style="border: 1px solid #dededf; background-color: #eceff1; color: #000000; padding: 5px; text-align: left;" bgcolor="#eceff1">Email</th>
    <th style="border: 1px solid #dededf; background-color: #eceff1; color: #000000; padding: 5px; text-align: left;" bgcolor="#eceff1">Open in CRM</th>
    </tr>
     HERE WE ARE GOING TO INSERT AN EXPRESSION LATER
</table>
</div>
Replace Subject, Name, Email and Open in CRM with your own headlines
Replace HERE WE ARE GOING TO INSERT AN EXPRESSION LATER with join(body('Select_HTML'),'')
Get lead owners e-mail
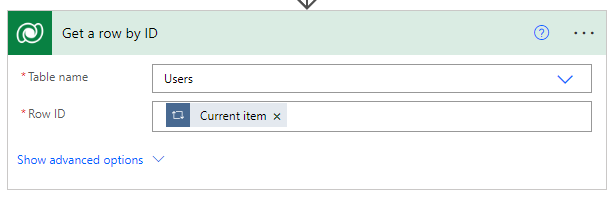
Since we already have the ID of the owner, we can use it to get the user details from the Users table in Dynamics
Still inside the loop insert an Get a row by ID action and select the Users table.
The row ID should be current item (and again, be carefull that you select the correct current item)
Send mail
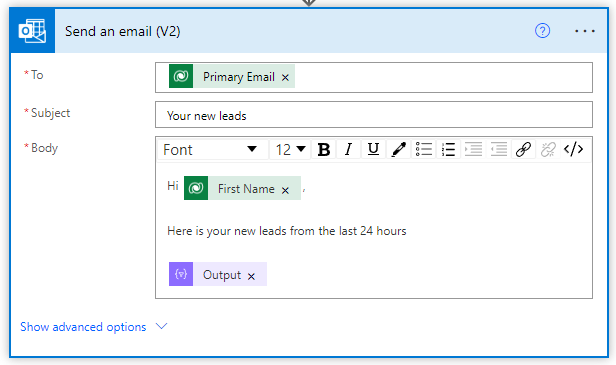
Last we will insert an e-mail to the primary e-mail we got from the user table, and in our body we will insert the output from our compose action
Final loop
Here is how my final flow looks like
E-mail
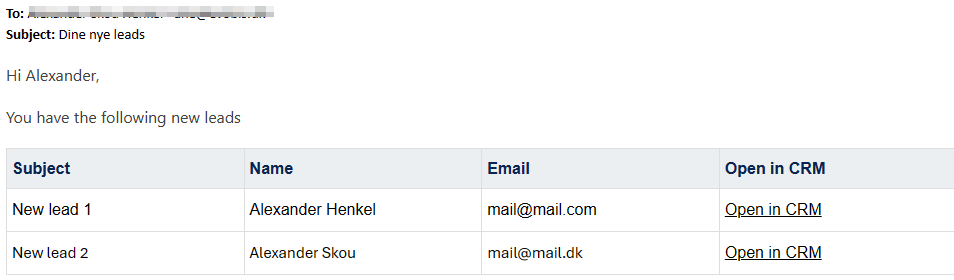
This is how the e-mail could look like
See also
- Remove whitespace from an integrated Power App in a tab
- Get all Power Automate flows in an environment in a spreadsheet
- Filter and search the termstore in SharePoint with Power Automate
- This operation contains a token that does not exist in the current workflow.
- Show last refresh date in local time on powerbi.com